It’s no SECRET I’m an art supply geek. Ask, the hubs, he’ll tell ya! Hey, I like to use them all! And, it’s no SECRET, I LOVE. LOVE. my Copic Markers and I LOVE. LOVE. LOVE. my Watercolors. So, I got to thinking… Hmmm… how can I achieve watercolor looks with my Copics.
So, on this day of LOVEY DOVEYness, I thought I would share a little Copic Tutorial I whipped up.
This one’s for all the “artists inside” who want to take their Copic work to another level. Today! It’s all about getting PAINTERLY effects with your Copic Markers.
Let’s get started!

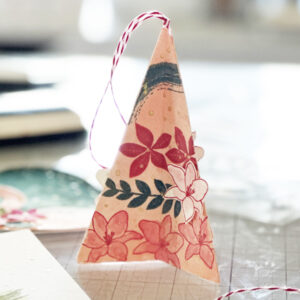
Gather up some Copics, a small primed canvas and a stamp you want to color! Using a light color ink pad (I used Memento) stamp the image a few times on the canvas to create a pattern. Use an ink pad that closely matches your Copic colors. PINK and PINK shown here. Randomly color in lights and darks in the stamp image. You don’t have to color the whole think. Just rough some color in. (There’s a sneaky peeky in there of my release with Avocado Arts NEXT month)

Here’s where it starts to get FUN! Squirt some blending solution in a small cup and get a paint brush. Not a good paint brush. Just a cheapo one! Dip it in the solution and PAINT/DAUB it on the colored images. MOVE the copic ink around using the solution. You don’t need a lot of solution. The more you use, the blobbier it will be. Play with it. The Colorless Blender solution will thin out the copic color and allow you to PAINT with it. How stinkin’ cool is that!

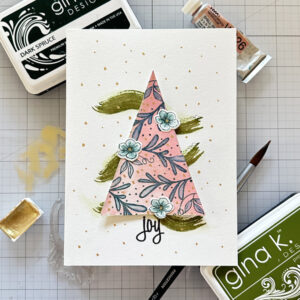
Gather two background colors. I used BG01 and BG05. Apply the light color to the background by flicking it about. Flick in some of the darker shade. Then, PAINT it out daubing and moving the blues into each other with the Colorless Blender solution. You will start to see the solution pulling other tones/shades out of the colors you have chosen. In this case, violet will come through the Blue Greens. It’s BRILLIANT!

Final Result: Painterly Effects with Copic Markers and Colorless Blending Solution. WAHOO! I love this technique. Simple, easy and SUPER COOL on the ARTSY scale! Notice the detail shot. Look at the Blue Greens in the middle and how some of the Red Violets mixed in. Brilliant Color and OH so much fun!
Try this technique out! I’d love to see what you create! Share!

Upcoming Canvas Class I’m teaching!
Want to create a larger project with me using this technique? Join me at PhotoScraps on Sunday, March 17, 2013 from 1-4pm and get your ARTSY self creating a 4×12 canvas using this stamp and some amazingsauce butterflies. Sample coming soon! This is a class you don’t want to miss!